Open 7 days: Mon to Sat 7am to 9:30pm, Sun 9am to 9pmLicensed and insured, MHIC #1459775921 Moravia Park Dr b6, Baltimore, MD 21206
Countertop guide

How to Prepare for Countertop Installation Day

Most countertop delays have nothing to do with the stone. They come from a sink that has not arrived, cabinets that are not level or a kitchen that is still full on install morning. TopStone Granite fabricates and installs stone countertops across Baltimore, and this checklist is what we wish every homeowner had in hand from the start.

It is built on 15+ years of installs and more than 650 completed jobs. We are licensed and insured under MHIC #145977.

Work through it in four stages: before templating, the day before installation, install day itself and the first 24 hours after.

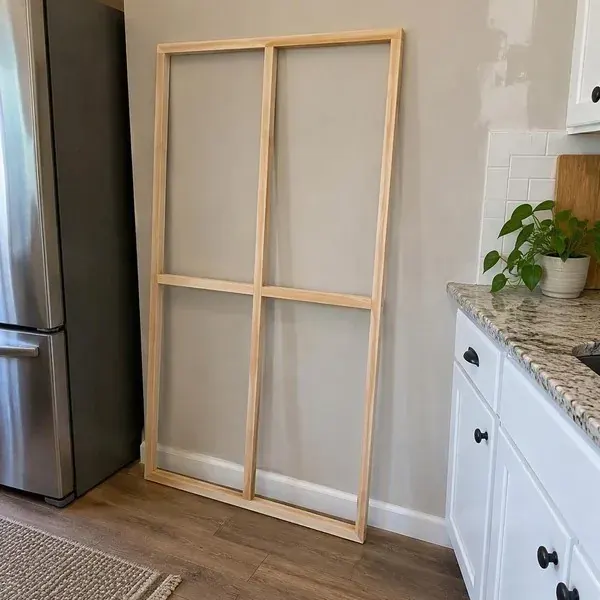
Countertop template frame laid on kitchen base cabinets, the first step to prepare for in a countertop installation
Licensed and insured
MHIC #145977
  • 15+years fabricating and installing
  • 650+countertop jobs completed
  • 7 daysopen every day of the week
  • Localshop on Moravia Park Drive, Baltimore

Before Templating

The template is the exact pattern your countertops are cut from, so the kitchen has to be in its finished state when we measure. Anything that changes after templating can mean a new template and a later install date.

Cabinets Set, Level and Fastened

New cabinets must be fully installed, screwed to each other and to the wall, with end panels and fillers in place. Stone is heavy and rigid, so the cabinet tops need to be flat and level across their full length.

Replacing tops on existing cabinets? Empty the sink base and check for soft or water-damaged wood, which should be repaired before new stone goes on it.

Sink, Faucet and Cooktop on Site

We cut openings to the actual fixtures, not to a catalog drawing. Have the sink, faucet and cooktop in the house, or at least the exact model numbers and spec sheets.

Farmhouse and apron-front sinks must be set in the cabinet before templating because the stone wraps around them. Our page on sink and appliance cutouts explains what each opening needs.

Decisions to Make First

Settle these before the template visit so they can be marked on the pattern:

  • Edge profile (our edge profiles guide compares the options)
  • Overhang depth for any seating area
  • Number of faucet holes, plus soap dispenser or filter tap
  • Stone backsplash height, or tile to follow later
  • Where you would prefer seams to fall, if your layout needs them

Old Countertops and Backsplash

Like-for-like replacements can sometimes be templated with the old tops still in place. Layout changes usually need the old tops off first.

Removing old countertops can crack or pull away tile backsplash. Plan on replacing the tile, or ask how it will be handled, and check your quote to see whether removal and disposal are included.

The Day Before Installation

A clear kitchen lets the crew work safely and finish sooner. Use this list the evening before:

  • Clear every countertop, including small appliances, knife blocks and anything on the backsplash ledge.
  • Empty the sink base cabinet completely, plus any base cabinets the crew will need to reach under.
  • Clear upper shelves near the work. Fitting and shimming can rattle cabinets, so take fragile items out of uppers above the work area.
  • Clear the carry path from your door to the kitchen. Move rugs, hall tables, plants and pictures that hang low on stairway walls.
  • Plan your meals. Expect to go without a kitchen sink for at least a day, so set up a coffee and snack station elsewhere and stock paper plates.
  • Find your water shutoffs under the sink and know where the main shutoff is.
  • Sort out parking. Save a space close to the door for a work truck, and tell neighbors if you share a driveway or alley.

Live in a city rowhome? Our rowhome countertop guide covers narrow stairs, carry routes and street parking in more detail.

On Installation Day

Install day is mostly about access and keeping people and pets clear of heavy stone.

  • Have an adult at home at the start to confirm sink position, overhangs and seam locations, and at the end for the walkthrough.
  • Keep pets and children away from the kitchen and the carry path. Doors will open often and pieces move on edge.
  • Unlock and prop the route once the crew arrives, including storm doors and gates.
  • Expect noise and some cutting. Final fitting sometimes means small cuts or polishing on site, and we follow OSHA's respirable crystalline silica standard when we cut stone.
  • Close doors to other rooms and keep vents in the kitchen area closed if you are sensitive to noise or dust from final fitting.
  • Do the walkthrough. Check seams, edges, overhangs and the sink, and ask about care for your specific material.

For a standard kitchen, most installers set the tops in a few hours to most of a day, depending on the number of pieces and cutouts. The full sequence from estimate to final walkthrough is laid out on our process page.

The First 24 Hours After Installation

New countertops look finished the moment the crew leaves, but adhesives, seams and sealants are still curing.

Seams and Overhangs

Seam epoxy and the adhesive under the stone need time to harden. For the first day, keep heavy items off seams and do not sit or lean on overhangs.

Your Sink and Plumbing

The adhesive holding an undermount sink typically needs about 24 hours before the sink takes real weight. Avoid filling it to the brim or piling in heavy pots until your installer says it is ready.

Your quote spells out who reconnects the faucet, drain and dishwasher. After the first run of water, check under the sink with a flashlight for drips.

Sealing and First Cleaning

Granite, marble and quartzite may be sealed at installation or need sealing soon after, while quartz does not need sealer. Ask which applies to your stone, and wait out the sealer's cure time before using cleaners on it.

For daily cleaning, use warm water with a little mild dish soap. If you want help with long-term care, see our stone sealing and polishing service.

Backsplash and Final Touches

Tile backsplash goes in after the countertops, so book your tile installer once the tops are set and the sink caulk has cured. Dishwashers under stone are fastened to the cabinet sides with brackets rather than screwed into the countertop.

Answers from our team

Preparation Questions

Do I need to empty my kitchen cabinets before countertop installation?

Empty the sink base and any base cabinets the crew needs to reach under. Upper cabinets can stay stocked, but move fragile items from shelves right above the work area. Drawers away from the sink usually do not need emptying.

Should I remove my old countertops myself?

Usually not. Removing old tops can damage cabinets, plumbing and tile, and stone tops are heavy enough to cause injury. Check your quote, since removal and disposal are often part of a professional installation.

Do I need to be home during countertop installation?

Someone who can make decisions should be there at the start and at the walkthrough. In between, you can step out as long as the crew has access to the kitchen, water shutoffs and a bathroom.

Request a quote

Questions Before Your Install?

Call or email us with anything on this list you are unsure about, from sink models to parking. We would rather answer a question the week before than solve a problem on install day.

Call (667) 400-3297
Call (667) 400-3297Quote